Help your users edit their DNS records

When I started working on an email service, I encountered a particular issue. Even though our users were already quite “technical,” most didn’t pass the DNS verification step.
We were losing around 60% of our users, so the conversion drop in the funnel had quite an impact. DNS was the #1 topic brought up to the Customer Support team. The thing is that this DNS verification step was not even the last one on the conversion funnel: users still had to complete a 10-question form, submit it, and wait for the Customer Support team to approve them. Then, only they were granted access to purchase a trial plan, which was mandatory to start using the service.
Do I need to tell you our conversion rate…?
Anyway. Improving our conversion funnel was one of my first projects when I started—a personal goal to increase this conversion rate by helping users verify their domain. Then, improving the onboarding journey, but that’s for another article.
I’ll share some features we implemented that helped us move the needle from the less dev-intensive to the most, hoping they’ll inspire you!
Showing the Help page
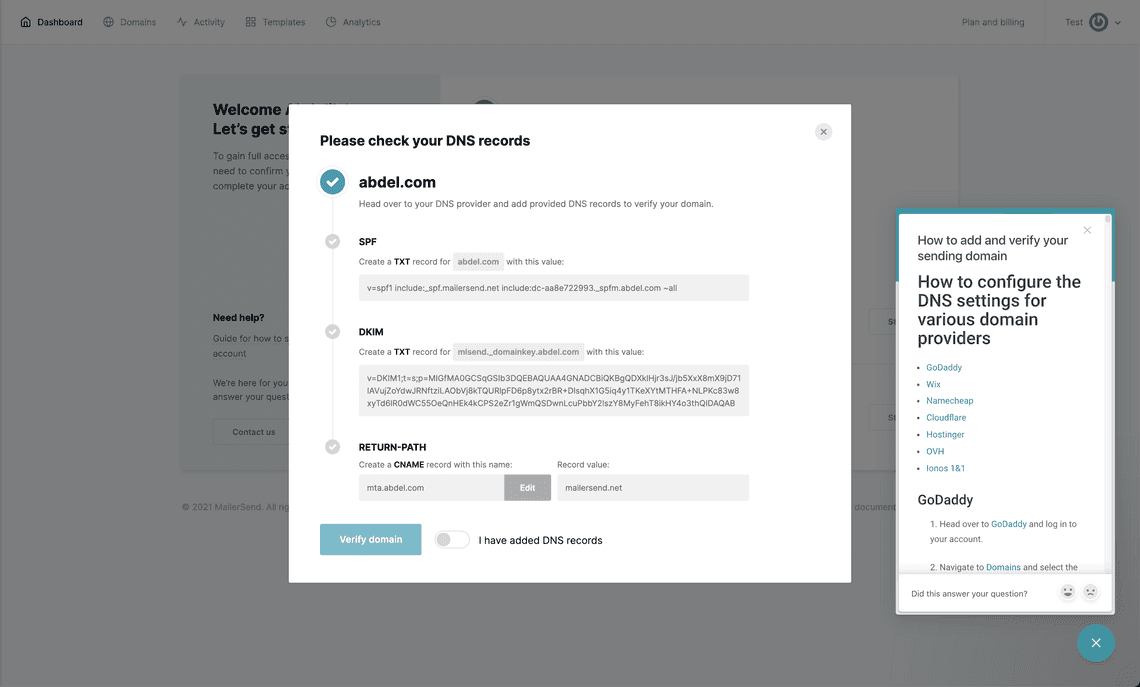
The help page giving instructions to edit DNS records is often buried in the Knowledge Base. Users have to switch tabs, open a new page and look for your website, find your KB, then the DNS article, and look for the instructions. Switching the tabs also creates a more significant cognitive load that users don’t need.
Alternatively, you could show your DNS help doc right on your app. If you already have Customer Communications software like Intercom or HelpScout, you should be able to add your Knowledge Base articles within it.
Setting up your Knowledge Base within HelpScout
Even on the Standard Plan (as of October ‘23), you have access to at least 1 Docs Knowledge Base.
- Create a new Site by going into the Manage > Docs page, give it a name, and assign it a subdomain.
- Once created, you can edit its visibility: you can keep it turned off if this is not your primary KB; it will still appear on your chat beacon.
- Create a collection and add categories and articles.
- Then, go to the beacon that is enabled on your app by going into the Manage > Beacons page. Enable a docs site to show off on that beacon by going to the Docs menu item.
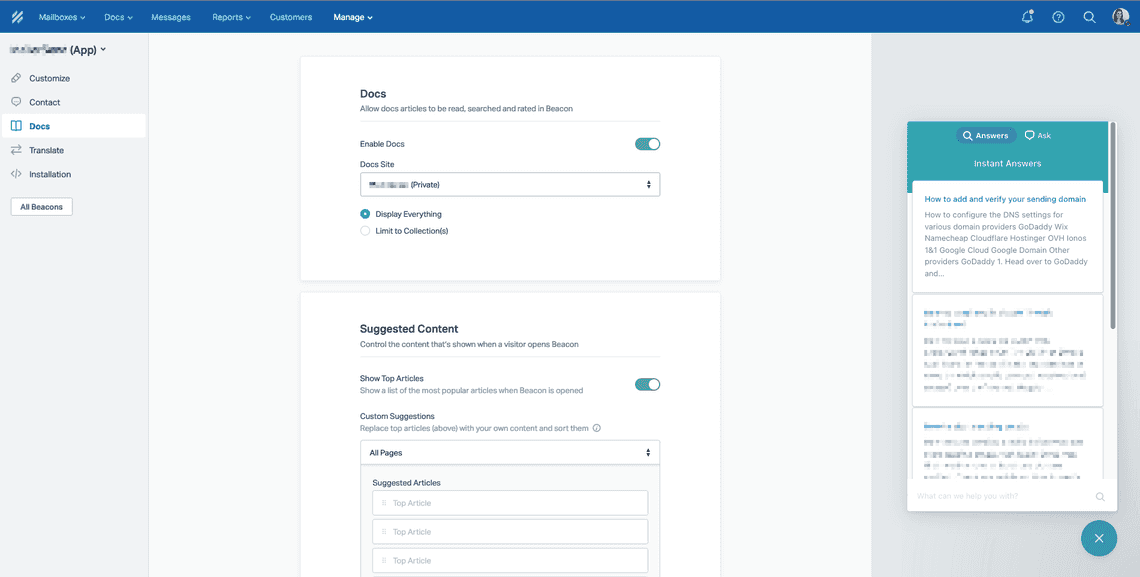
Beacon('show-message', 'HELPSCOUT_ARTICLE_ID')
Offer chat support
Real-time support can incredibly improve your conversion rate if you have the resources. Technical customer support can help your users in verifying their domain. When we did this, we used HelpScout’s saved replies and created three, each tackling a specific common issue our users were experiencing:
- The domain is not required in the value for some registrars. Some require a ”@,” and others require adding the TLD.
- There are multiple SPF values present even though there can only be one SPF record per domain (providing an article on how to combine various SPF values can be interesting as well)
- The user should have waited longer for the DNS propagation.
This solution is good but not scalable: you might use it initially when discovering your users and the common issues they’re facing.
Improve your feedback messaging
Errors
Even though errors are common, it’s funny how they don’t receive the attention they truly deserve. A helpful error message should satisfy these qualities:
- Explain that there is a problem
- Explain what the problem is
- If possible, provide a solution so that the user can complete the process, or
- Point them to where they can go for help
- Make a frustrating scenario as pleasant as possible
For a complete guide on improving your error messages, consult freeCodeCamp.
For each DNS record you request, add a specific error message to point out which DNS record is false. Add common troubleshooting tips (for SPF, for example, there can only be a unique record).
Email the user when the domain wasn’t successfully verified, but wait 24 hours for the check. Add the specific DNS records that are incorrect with their correct values on the email. It is even better to fetch and compare the current value to the requested value!
Success
Notify your user when they successfully verified their domain! When they add their records, add a verification trigger; that trigger could be working in the backend and show the results in a few minutes. Make sure to add a tooltip: “You’ll receive an email when your domain has been verified.”
Manage expectations
With microcopy
DNS propagation can take time, manage expectations with some microcopy: “Need help? Before contacting us, please remember that it may take up to 24 hours for new DNS settings to become active worldwide, depending on the provider.”
To the verification trigger, add a notification: “We are checking DNS records changes. This can take up to 24 hours”.
With additional information
With this simple copy below, we provide enough information for the users to keep their sanity and give enough context to know when there is a problem, we’re empowering them and leaving them with a positive experience:
How long does it take to verify the domain?
- Your part: 5 minutes
- Time until the domain is fully verified: up to 48 hours.
Does it always take 48 hours? Once you update your domain settings, verifying the domain can take up to 48 hours. It’s an automated process that we can’t speed up but sometimes finishes faster.
If your domain is still not verified after 48 hours, ensure the records are correct by checking the SPF and DKIM records on Mailertest.com or ask your domain administrator to take a look before contacting Customer Support.
Did you see we allow them to check their DNS records by themselves? Mailertest is a simple tool to review the published DNS records of any domain, and it’s free.
Add a sharing option to the DNS instructions
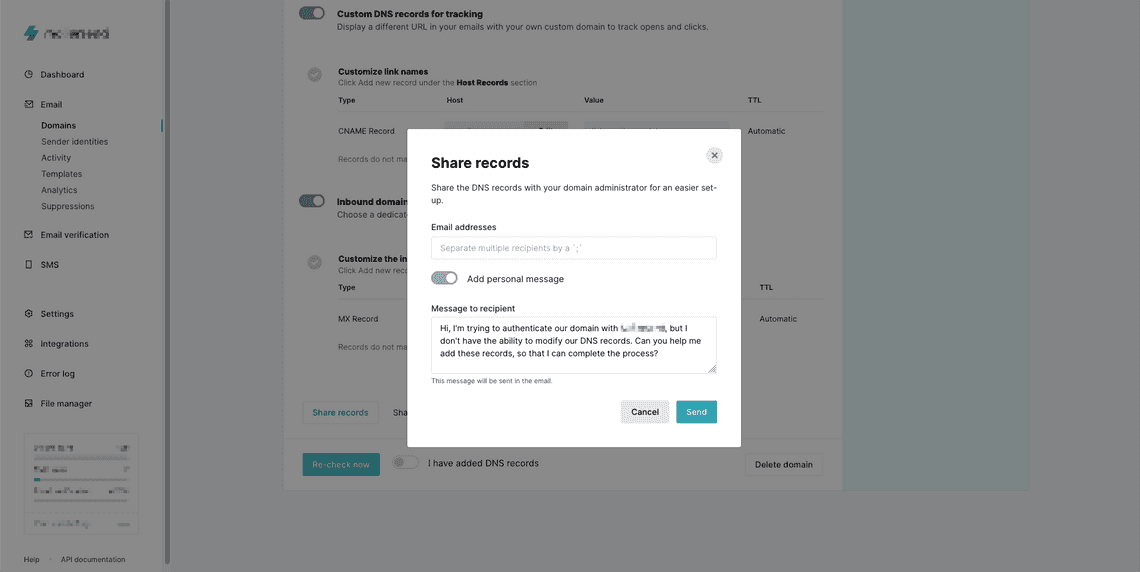
Frequently, someone other than the user signing up for your service might be a better person to edit DNS records, so they can find it helpful to share the DNS instructions. That could be done by sending an email with the customized DNS records to the right person.
Add an option to send the DNS instructions to the administrator with a modal, asking for the administrator’s email and the possibility to add a custom message.
Show custom instructions based on the domain provider
This feature had the most impact on our user base: instead of showing default instructions for all providers, we added a provider identification service and a set of customized instructions for that specific provider.
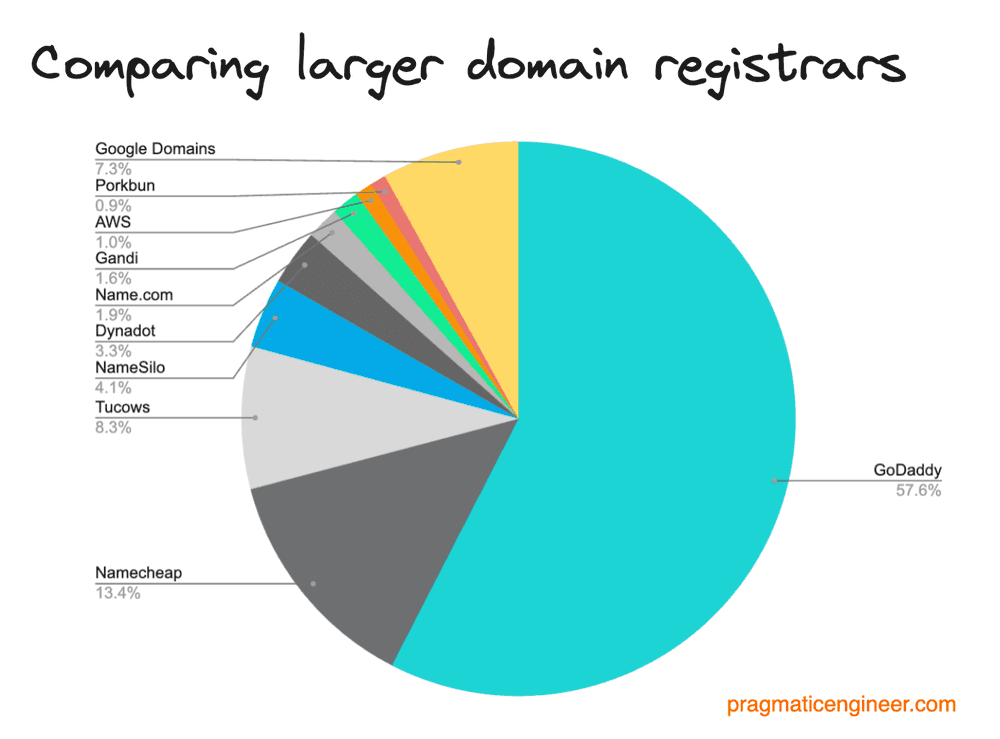
There is no need to show all the existing domain providers out there. What’s interesting is to discover the ones that are the most popular in your user base (or the preferred ones of your target demographic, like what the Pragmatic Engineer did for developers, you can have a few surprises!). Find out the registrars that cover around 60-80% of your users and write the instructions for those. Don’t forget to add an “Other” option with default instructions when you don’t have the specific registrar in your choices.
On our side, the most used registrars were the following, in descending order:
- GoDaddy
- NameCheap
- Google Cloud (Google domains are going to be discontinued soon, following their acquisition by Squarespace in June’ 23)
- Cloudflare
- Hostinger
- OVH
- IONOS
For your convenience, I’ve shared the copy we used to provide custom instructions for our email service for the above domain providers.
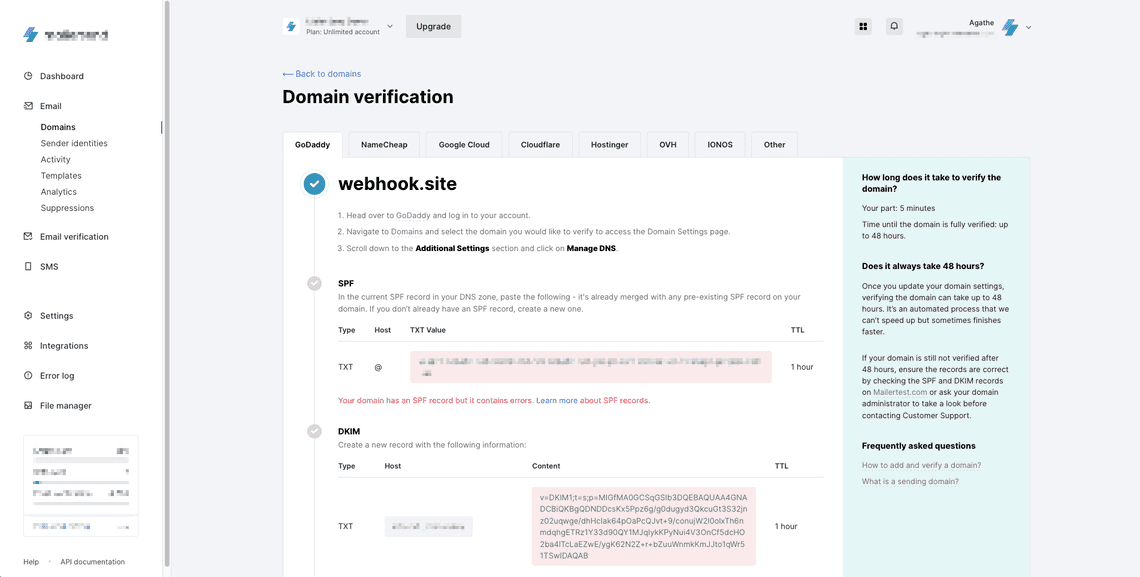
Provide a subdomain you own
Generating a subdomain from your domain and allowing your users to use it effectively removes the step entirely. That enables users to use your product without committing to a time-intensive task and leaves this step for when they’re convinced about your product and want to devote more time and energy to it.
Add Domain Connect
I share this solution at the end of this article because it’s work-intensive. It requires some help from legal and implementation from the supported domain providers. Domain Connect is a service that automatically edits DNS records without going to the registrar. Domain Connect connects Service Providers and DNS providers so users can edit their DNS records without too much trouble and technical knowledge, just like an oAuth framework. If the domain of the account is owned by one of the registrars in the Open Connect list, then their DNS records should be updated without the user’s manual input.
To connect to Domain Connect, you have to:
- Define and publish a template (copy and edit one of the existing templates on their public GitHub repo, pick a service similar to yours)
- Sign the template and test it
- Contact DNS providers and share the template using the below email messaging template
- Implement the protocol in your app’s flow (example here). The full source code for this website is available here. PHP library
Not all registrars are registered in the Domain Connect service, and some require legal agreements to be signed in order for your template to be implemented on their side.
Hello {Domain_provider},
We are {Your_company_name}, and we would like to allow our users to edit their DNS records from your platform automatically. We’re in the process of integrating DomainConnect into our app.Please add our template to your database.
< ‘Link to Github template’>
Thank you very much.
Once your template is implemented in the different supporter domain providers, edit your app’s copy to reflect this change:
We found your {Domain} domain at {Domain_provider}. We partnered with {Domain_provider} so you can automatically and instantly verify your domain.
Log in {Domain_provider} to verify automatically?
Results
On my side, when I implemented some of these features (as of October ‘23, we implemented all except the Domain Connect and subdomain ones), here are the results I got:
- DNS editing help article displayed, DNS setup instructions sharing, and DNS messaging feedback improvements increased the ratio of verified domains from 36% to 50%.
- The custom instructions helped so much the users that DNS lost its place as the #1 topic brought up to CS, to be ranked after the top 10. (I’m still waiting for the results on the conversion ratio; I will update this article ASAP).
As you can see, you can implement many improvements to increase the number of verified domains; which did you test? Which worked the best for your use case? Let me know in the comment section!
